I'd like to say Merry Christmas to all of my regular readers (OK...Both of my regular readers--my Mother and Allison.)
To the rest of you that are just stopping by for the first time or stop by occasionally, I offer the same greeting to you.
I also offer the following advice:
Cook something new today.
Try something different.
Make something unique.
Take a chance...
heck, if you can't use you own family as Guinea Pigs, who can you use?
Saturday, December 24, 2005
Friday, December 16, 2005
Seafood Dip
“it doesn’t taste like kitty food”
We’ve attended a wonderful series of holiday parties this past week—some in private homes, and one put on by the owner of our favorite restaurant, “The Blackwater Grill.”
Since we weren’t sponsoring a party ourselves this year here in the old condo, we volunteered to cook up some vittles to augment the spread of food at a party put on by our neighbors Bruce and Ski.
Pat made two variations on her Chicken Salad, and I surprised myself with a cream cheese based seafood dip that exceeded my own pompous expectations.
Here’s what your need to do to make a very good, but somewhat tedious seafood dip:
(3) 8 ounce packages of cream cheese.
½ cup lite mayo
½ pound fresh or frozen shrimp
1 pound snow crab clusters
3 green onions, diced fine
2 tbsp lemon juice
½ tsp paprika
1 tbsp Worcestershire sauce
For the cocktail sauce:
2/3 cup catsup
2 tbsp Worcestershire sauce
4 tbsp prepared horseradish
1 tbsp lemon juice
1 tbsp Tabasco sauce
Redneck Tip: Almost all of the recipes on the internet call for the use of canned shrimp. You can use canned shrimp if you want to—it’s your dip—but you might as well be using cat food in your dip, in my considered Redneck opinion. At least use good frozen shrimp, and fresh shrimp if you can get them, it makes a HUGE DIFFERENCE in the flavor. I’ve tried to eat this stuff at parties over the years and although I LOVE seafood, making a dip with cheep, crappy, canned shrimp makes me GAG.
First things first.
Toss your cream cheese out on the counter to let it warm up to room temperature, then cook your shrimp and crab.
You know, boil some water, toss in some salt and seasoning (red pepper, etc.) and cook for five to eight minutes or so until your shrimp turn pink and the shells on the crabs do likewise.
Pour your water and shellfish through a colander, let everything cool off so that you can handle it, then shell your shrimp and crab legs.
Redneck Tip: I know, I know, I know…it’s hard work, but believe me it is worth the effort. I used this opportunity to clean out our freezer of some larger stronger flavored shrimp that Pat didn’t like in pasta dishes and some crab legs that had developed a bad case of ice crystals inside the plastic storage bag. The results were fabulous...
Dice up your shrimp and crab parts into ¼ inch pieces. Once you have a bowl full of little seafood parts, drizzle your lemon juice over everything and sprinkle with paprika and Worcestershire sauce.
In a mixing bowl, toss in the cream cheese, mayo, and green onions and mash everything up good with a fork or a dough cutter. Next add your seafood parts and keep mixing. Use your fingers if your dare.
When you are satisfied with your mix, dump the whole thing out on a platter or a plate and shape it into a big symmetrical “dome.”
Cover it with saran wrap, then place it in the fridge for a couple of hours (mine sat overnight.)
Whip up the cocktail sauce in a mixing bowl, then pour it over the top of your dip when you are ready to serve it. Surround it with some Captains wafers and other crackers, toss it out in front of your guests, and EAT.
Regards Y’all,
The Redneck Gourmet
Stuffed Cabbage
Talk about somebody being in a rut. That’s where my cooking has been this past month.
Don’t get me wrong here—I’ve been producing a bunch of good food, I’ve just mainly been cooking my standard recipes and haven’t felt that I had anything really interesting to write about.
Fortunately for me and the Blog, I’ve got a couple of new things worked up now and the first one I want to introduce is last evening’s dinner entrée—Stuffed Cabbage.
My girl Pat grew up cooking and eating Stuffed Cabbage while I only used cabbage for coleslaw, but we still spent some time looking around on the internet and we ended up making a few modifications and combining some ideas we found. I might have a little fine tuning to do on the quantities, but I feel the necessity to get something published here on the blog so here goes…To make our Stuffed Cabbage, you’ll need the following ingredients:
Two medium heads of cabbage
For the sweet and sour tomato sauce:
2 tbsp olive oil
2 cloves garlic—smashed and minced
2 28 oz cans whole peeled tomatoes
6 8 oz cans unseasoned tomato sauce
2 tbsp white vinegar
2 tbsp sugar
1 tbsp dried parsley
Salt to taste
Black pepper to taste
For the meat filling:
2 tbsp olive oil
2 cloves garlic—smashed and minced
½ yellow onion--diced
1-1/2 lbs ground beef
½ pound ground pork
1-1/2 cups instant rice
1 tbsp dried parsley
1 can tomato paste
2 tbsp red wine
First you make a sweet & sour tomato sauce. Add the olive oil to a large boiler over medium heat. Add your garlic and sautee for a few minutes, being careful not to burn it. Meanwhile, dump your whole tomatoes into a mixing bowl and break them up with your fingers or a fork.
Add the mashed up tomatoes and the tomato sauce to the garlic in the boiler and turn the heat down a little. Now add the vinegar, the sugar, the parsley, and a little salt and pepper and let it simmer for at least 30 minutes (my sauce cooked a couple of hours.)
Place your ground beef and pork in a large mixing bowl, add your instant rice, and stir everything together well.
In a large skillet, sautee your diced onion in a couple of teaspoons of olive oil. After a few minutes, add the minced garlic. Once the onions and garlic have cooked (5 minutes or so), add the tomato paste, splash in the red wine, and the parsley. Turn off the heat.
When you’re happy with your sauces, peel the crappy outside leaves off your cabbage and discard them. Put the cabbages in a couple of large boilers and cover each head with water. Bring them to a low boil. Once the water boils, turn off the heat and let your cabbage coast for a few minutes, then dump out the hot water and add cold water to stop them from cooking.
Once they have cooled off so that you can handle them, carefully peal the leaves off each head and make a nice pile of leaves ready for stuffing.
Now add the contents of the skillet (onions, garlic, tomato paste, etc.) to the meat in the mixing bowl. Mix well with a spoon or your hands.
Spray two 9x13 Pyrex dishes with non-stick spray. Preheat your oven to 350 degrees F.
Now the fun part. Take a knife and slice the big rib out of the middle of each cabbage leaf, then spoon two or three (or four) spoonfuls of the meat mixture into the leaf and roll it up real tight. Place your stuffed cabbage leaves in uniform rows in the dishes. Use your good judgment as to the number of leaves and the quantity of meat to put in each leaf.
Once you have a couple of dishes full of stuffed leaves, pour your tomato sauce over the top of everything and smooth it out with your spoon. Cover each dish with aluminum foil and pop them in the oven for about an hour and fifteen minutes.
Start checking how done things are after about an hour in the oven. Then pull your cabbages out, let them cool a little, grab yourself a fork, and EAT.
Regards Y'all,
The Redneck Gourmet
Friday, November 18, 2005
Thursday, November 17, 2005
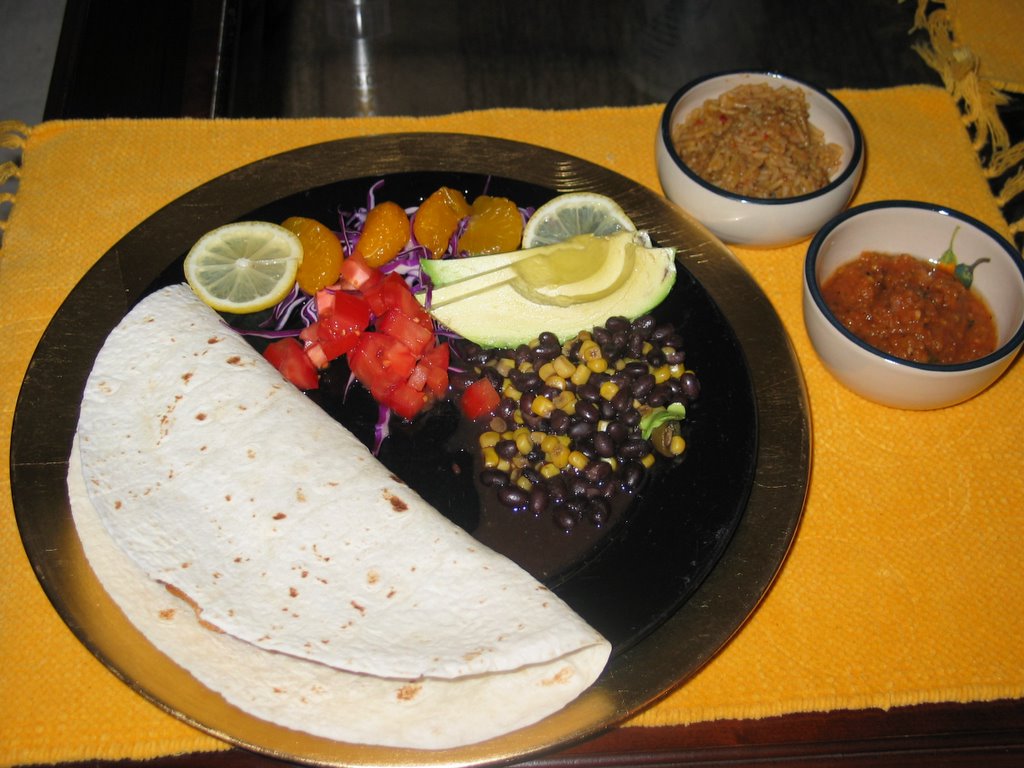
Mexican Soft Tacos—Chicken or Fish
With Black Beans and Corn
A new Mexican restaurant opened here on the island this summer. The local residents were excited because previously there had been only one Mexican establishment on the entire island and its reputation was less than stellar.
Its arrival made me quite happy, because I missed eating Mexican food once a week like I did when I lived in Atlanta. There must be a law or a rule or something that requires that there be a Mexican restaurant located every ½ mile along the roads in Atlanta. Imagine that?
The new local restaurant is excellent, and their cooks do some interesting twists on what had become, for me, somewhat mundane standard Mexican cuisine. They make a dozen different varieties of “soft tacos.” None of those hard fried corn taco shells that crumble in your hands and dump their contents in your lap when you bite into them, the soft taco uses a warm flour tortilla to contain the meat and vegetable contents
I’ve done some research on the internet and discovered some additional ideas, and combining those ideas with what I learned at the restaurant, here are my own two versions of Mexican Soft Tacos that I made this week.
You’ll need the following ingredients to make dinner for two. It looks like a lot of work, but they’re really very easy:
Chicken Soft Tacos:
One or two boneless chicken breasts
½ lime
2 large flour tortillas
Fish Soft Tacos:
Two or three small Tilapia filets (or other mild white fish of your choice)
½ lime
1/3 cup flour
½ tsp baking powder
1 egg
1 can of beer, room temperature
1 tbsp taco seasoning (see below)
oil for frying (I use peanut oil)
2 large flour tortillas
For the toppings:
1 cup red cabbage, shredded fine
11 oz can mandarin orange segments (pour off the juice)
jalapeno peppers (as many as you can stand—be careful)
1 sliced avocado
1 lime for squeezing
Salsa sauce:
2 medium tomatoes
2 or 3 small hot or mild peppers
¼ red or yellow onion
½ lime
splash of vinegar
For the Taco Seasoning:
1 tablespoon chili powder
1/4 teaspoon garlic powder
1/4 teaspoon onion powder
1/4 teaspoon crushed red pepper flakes
1/4 teaspoon dried oregano
1/2 teaspoon paprika
1 1/2 teaspoons ground cumin
1 teaspoon sea salt
1 teaspoon black pepper
Black Bean and Corn Mix:
15 oz can black beans
8-1/4 oz can whole yellow corn
1/4 cup of water
a splash of chicken stock or ¼ tsp of chicken bullion powder
½ tsp taco seasoning
First things first. Mix all of your taco seasoning ingredients together in a small mixing bowl. You can also use prepackaged taco seasoning if you want to, but I prefer to make my own because I can control the flavor.
Place the tomatoes, the peppers, the onion, and the ½ lime in the oven on broil. Cook everything until the skins start to blacken lightly, then remove from the oven and set aside to cool.
Once cooled, place the tomatoes, peppers, and onion into the blender or food processor, squeeze in the lime juice and add the vinegar, then pulse to chop the mixture up as finely as you would like.
Whether you’re using chicken, fish, or both; rinse the meat off, pat dry, and place it in a shallow bowl. Squeeze the lime juice over the meat and turn to coat, sprinkle with taco seasoning, cover and set in the refrigerator for at least a half hour.
If you’re making fish tacos, go ahead and open the beer, drink two thirds to three quarters of it, then let it set and warm up a little.
Redneck Tip: You can also use warm flat beer left over from last night if you want to.
Now whisk together the flour, baking powder, egg, a few splashes of warm beer, and 1 tbsp of taco seasoning in a medium mixing bowl. What you’re doing is making a batter that needs to be thick enough to stick to the fish, so if you get it too thin like I did the first time, just add a little flour to thicken things up. When you are satisfied with your batter's consistency, cover it up and place it in the fridge for a half hour.
While the chicken/fish is marinating and the flour is resting in the refrigerator, dump the black beans and corn into a small skillet and add the water, chicken stock, and taco seasoning. Turn the heat on a very low setting and let the mixture cook to reduce while you finish your tacos.
Toss a large skillet on the stovetop on medium heat and add enough oil to fill ½ inch deep. If you are cooking chicken, you’ll need a separate skillet to cook the chicken in. Put a splash of oil in it also and set the heat on medium low.
Sprinkle your tortillas lightly with water, wrap them in aluminum foil, and place them along with your plates in the oven to warm.
Now you are ready to cook.
The chicken is easy—toss it in the skillet on medium low and cook for a couple of minutes on each side. Now pull it out onto a cutting board, slice thinly, sprinkle with more taco seasoning, and place back in the skillet to finish cooking. I like my chicken well done, but not tough, so go easy on the heat here.
The fish is a little more work. Pull your fish and batter out of the fridge, dredge the fillets through the batter, then fry each piece in the grease for three to five minutes on each side (the time depends on thickness.) When they’re done, place them on the side on paper towels to drain.
You're on the home stretch now--pull your tortillas out of the oven, place your plates on your chargers, and lay a tortilla in the middle of each plate. Put a piece of chicken or fish on the tortilla and fold the tortilla across the meat. Now spoon out some of your black bean and corn mixture onto the plate, place your condiments (shreaded cabbage, sliced avacados, orange segments, salsa, and sour cream) and plates on the table, grab yourself a fork, and EAT.
Enjoy Y’all,
The Redneck Gourmet
Tuesday, November 08, 2005

Sunday, November 06, 2005
Tuesday, November 01, 2005
I Almost Forgot...
The Redneck Gourmet Turns One Year Old
My humble cooking blog will be celebrating one year on November 9th.
I guess that I'll have to come up with something special to cook, and I might re-run a recipe or two to highlight them to those too busy to read my archives.
Stay tuned, folks...
My humble cooking blog will be celebrating one year on November 9th.
I guess that I'll have to come up with something special to cook, and I might re-run a recipe or two to highlight them to those too busy to read my archives.
Stay tuned, folks...
Monday, October 31, 2005
Cooking Re-Runs
Sorry folks, but the new recipes have been few and far between this past month.
I've basically been doing two things--re-cooking stuff that I've already published to check the ingredients and step-by-step instructions; and doing a lot of baking.
Bread baking.
Last week I made a crusty walnut/raisin whole wheat bread and a couple of loaves of french bread. I also baked the chewey double chocolate chip cookies again.
I made a pretty unspectacular chicken and rice soup for dinner last night that featured home made stock from a whole chicken and Mediterranian spices like Ginger along with lemon juice. It was sorta funky tasting, to say the least.
I think that it needs more work before publishing.
So any way, please bear with me and I promise to have something new written up in the next week or so.
Regards Y'all,
The Redneck Gourmet
Tuesday, October 18, 2005
Spicy Banana Nut Bread
Got Bananas?
Twice in the past year I’ve been given free bananas. Once I received bananas that were left over after a weekend race for charity. I must have had a dozen and one-half bananas sitting on my countertop turning black ripening. I couldn’t possibly eat that many bananas and I didn’t want to throw them away, so I decided to figure out how to make banana bread. And I did, I just didn’t publish the recipe at that time.
On Sunday my 84 year old neighbor “Bucky” told me that someone had given him a big bunch of bananas and asked me to take some. I immediately thought of making banana bread, so I took home some really ripe bananas.
Here is what you need to make one 5” x 9” loaf:
3 medium bananas, pealed and mashed
1 cup of whole wheat flour
1 cup of plain flour
½ tsp baking powder
½ tsp baking soda
½ tsp salt
½ tsp ground cloves
½ tsp nutmeg
½ tsp cinnamon
½ cup plain sugar
½cup (1 stick) butter-cut into 1/8” slices
2 eggs—lightly beaten
½ cup walnuts-diced
½ cup currants (small raisins)
½ cup dried apricots, diced
2 tbsp brandy
First toss your butter out on the counter and let it warm up to room temperature. Turn on your oven and preheat it to 350 degrees. Grease the sides and bottom of your 9” x 5” loaf pan with butter.
While your butter is warming, mix together the whole wheat flour, the plain flour, the baking powder, baking soda, the salt, and the spices in a medium mixing bowl.
Peal your bananas in a small bowl and mash them up real good with a fork.
Put your walnuts, currants, and diced apricots in a small bowl and drizzle the brandy over them.
Redneck Tip: You can skip this step if you don't have any brandy, but it adds a subtle flavor to the finished bread that I like. Heck, if you like brandy, use a little more if you want.
Once your butter has warmed up, put your sugar in a separate mixing bowl, and add the butter slices. Now cream your butter and sugar together with an electric mixer.
Now add your eggs and whip with the mixer until fluffy, then start adding small quantities of the flour mixture and the mashed bananas as you keep mixing with the electric mixer.
When everything is nice and smooth, dump in your walnut/currant/apricot mixture and mix a little more, but don’t over do it—you just want to evenly mix everything.
Pour your batter into your loaf pan and spread it out evenly with a spatula. Pop it in the oven and cook until golden brown, about 60 minutes in my oven.
Enjoy Y’all,
The Redneck Gourmet
Sunday, October 16, 2005
PiZZa—Phase II
As I wrote back in April when I first tried to cook it: I love good pizza.
Not just any pizza, I want good pizza.
I’ve cooked pizza at least once a month since then, and I’ve finally gotten the crust making process down to an art. Having modified the quantity of ingredients and understanding the method a little better, I feel like it is worth writing about it again to bring the recipe to the attention of my new readers.
If you have never had what I consider to be good pizza, you are missing a real culinary treat. This means that if you eat pizza you are probably happy having Pizza Hut, Dominoes, or Pappa John’s deliver some mishy-mash of cheese stuffed crust with cinnamon sticks and a large bottle of flat soda to your door for $13.98 (such a deal) with a coupon. Every time I try this approach, I swear to myself that I’ll never do it again.
Making home made pizza dough is not something that you can do in thirty minutes after you get home from work and the kids are screaming, but you can do it on a Saturday afternoon when you have the time to let the dough rise.
I said LET THE DOUGH RISE. The first time I made the recipe I was hard headed and rushed the process, didn’t let the dough rise fully, and used all of the dough to make one really fat, 2” thick crust 14” pizza. The dough tasted fine, but it was way too much crust for a single pizza.
This afternoon I again took my time, let the dough rise properly, and made one nice thick crust 13” pizza. Mama Mia…It Worked—I can hardly believe that I made this pizza myself.
Here is what I did:
For the Dough Starter—
¾ cup plain flour (not self rising)
¼ cup warm water
1 pack of fast acting yeast
For the main dough—
1-1/2 cups plain flour
3/4 cup room temperature water
1 tsp salt
For the Tomato Sauce—
(1) 8 oz can Hunts No Salt Tomato Sauce
(1) 6 oz can tomato paste
1 tsp dried oregano
1 tsp dried basil
1 tsp dried parsley
A couple twists of fresh ground black pepper
Toppings—Take your pick, you know what you like…I used
Extra Virgin Olive Oil
Sliced pepperoni
Spicy Italian Sausage
Sliced black olives
Sliced mushrooms
Marinated artichoke hearts, sliced
Sun dried tomatoes
Shredded mozzarella cheese
Crumbled Feta cheese
Making the dough is a two part process.
First you make the starter by combining the warm water and the yeast in a small glass measuring cup. Stir the mixture up and let it set for ten minutes. This activates the little yeast beasties and gives them a chance to stretch their legs and get ready to do some work for you.
Once you have a ¼ cup of hungry yeast, howling for something to eat, pour your water yeast mixture into a small mixing bowl containing ¾ cup of flour. Take a wooden spoon and stir everything up until the dough starts to pull away from the walls of the bowl.
Knead the dough a little with your fingers, shape into a ball, and then put your dough ball on a plate and cover it with a clean dishtowel. Now let it rise for thirty to forty-five minutes. Fix yourself a drink and get the rest of your ingredients ready. Watch a little TV if you want to.
When you starter has risen, add 3/4 cup of water into your starter and stir it all up to dilute. In a large mixing bowl combine the 1-1/2 cups of flour and the 1 tsp salt and mix thoroughly. Now slowly add your starter/water mixture to your flour/salt mixture and mix it all together with a wooden spoon or, if you’re brave like me, with your bare hands.
Redneck Tip: Wash your hands, then dry them and pour a teaspoon of olive oil into one hand and oil your hands before working with the flour. This will cause the dough to not stick as badly.
Keep working your dough until it starts pulling away from the sides of the bowl. Lightly dust the clean countertop or a large cutting board with flour, then turn out your blob of dough and knead it lightly. I mean LIGHTLY. I’m not going to try to tell you exactly how to knead dough here, it’s not rocket science, but it is important to work your dough to mix the ingredients but not over work it—else it will be TOUGH. As I’ve said earlier, practice makes perfect.
Now put your dough ball on a cookie sheet, cover it with a clean dishtowel, and allow it to rise from 1-1/2 to 2 hours. The dough should double in size, so you can adjust your “rise” time based on what your eyeballs tell you.
While you are waiting, make your sauce by combining the tomato sauce, tomato paste, and spices in a small boiler over low heat. Heat until you want to use some, but don’t let it boil.
When you are close to having the dough ready, kick the heat on your oven up to 500 degrees F.
When your dough has adequately risen, uncover it, move it to the side, and re-flour your work surface. Now place your dough in the center of the work area and fold the dough back onto itself from four directions, trying to maintain a round shape. Now kneed the dough gently and work it out with your hands (or use a rolling pin) into a 13” or 14” round shape, maintaining a thicker rim and a thin middle section.
I actually picked my crust up and worked it with my knuckles in the air like the pizza guys do on TV. If you tear a little hole in it, just place it back on the work surface and pinch the hole closed. When you are happy with your crust or afraid to mess with it further, place it on your pizza pan or pizza stone.
Now this step is important. Drizzle a little olive oil over the center of the crust, omitting the outside edges if you want them crispy. Smear the oil around with a spoon or your fingers to evenly coat the crust. This oil is important in order to keep the tomato sauce and other juices from soaking into your crust while your pizza cooks in the oven.
Now smear the tomato sauce over the center of your crust. Use a large wooden spoon to evenly spread the sauce over the area—not too thick. I like to cook my pizza with a thin coating of sauce and place extra sauce on the side on the table.
Sprinkle a thick layer of Mozzarella cheese over the sauce, add your other ingredients, and another layer of cheese if you want. It's your pizza--be creative.
Here is something else that I've started doing that helps thicken the crust. Let your finished pizza sit on the counter for fifteen minutes or so before you put it in the oven to cook. The yeast in the dough will continue to make the crust rise and you'll get a nice, light, fluffy crust interior with a crisp exterior as a reward for your patience. I really like the consistency that results.
Now you are on the downhill stretch. Toss your pizza in the oven, pour yourself a glass of wine, and do a few dishes while your pizza cooks. My oven takes about 20 minutes at 500 degrees.
Pay attention to your crust after about 18 minutes of cooking--don't burn your masterpiece.
Pull the pizza out and place on a cutting board, place your extra sauce in a bowl on the table, slice your pizza, toss it on plates, top off the wine glasses, and EAT!
Enjoy Y’all,
The Redneck Gourmet
Wednesday, October 05, 2005
Chewy Double Chocolate, Chocolate Chip, Oatmeal Cookies--UPDATED!
(More than a mouthful)
I first wrote about these cookies back in November last year right after I started writing The Redneck Gourmet. This is my own original recipe that I've developed in an attempt to duplicate some cookies that I used to buy at Harry's Farmer's Market in Atlanta back in the late 1980's.
I have cooked several batches since I first published the recipe and I have slightly refined the ingredient list and the process, so I thought it would be worthwhile to write about them again after cooking my latest batch last night.
I'm not just saying this because I cook them, but believe me--these are some of the best darn cookies you will ever put in your mouth. YOU NEED TO TRY COOKING THEM.
Here is what I use to make my cookies:
2 sticks butter + 1/4 stick
2 eggs
1 cup white crystal sugar
1 cup dark brown sugar
1 tbsp cinnamon
2 tsp vanilla extract
1 cup Quaker oats
1-1/2 cups semi-sweet chocolate chips
1 cup walnut pieces
1/2 tsp salt
1 tsp baking powder
1 tsp baking soda
1-1/2 cups cake flour, sifted
1/2 cup whole wheat flour
3 squares unsweetened baker’s chocolate
According to my Betty Crocker Cookbook, there are a couple of details that ensure good cookies. I followed Mrs. Crocker’s instructions and my cookies came out perfect.
Betty Crocker Tip: First, let your butter soften at room temperature for 20 to 30 minutes before you use it. Second, if you don’t have flat cookie sheets (I don't,) turn your sheets upside down and cook your cookies on the back of the sheet.
Now, as to making great cookies, in a double boiler, combine ¼ stick of butter and three squares of unsweetened baking chocolate and heat over medium heat to melt, stirring occasionally.
In a large mixing bowl, combine the white crystal sugar, the brown sugar, the oats, and the cinnamon. Mix everything together with your hands to combine very well. Slice your softened butter into 1/8" thick pieces and slowly add it to the sugar/oats mixture as you beat it with an electric mixer on low speed.
Do not over beat, just break up and distribute the butter evenly. Now add the eggs and vanilla and beat some more.
Sprinkle in your chocolate chips and walnuts and beat lightly with the mixer. Be careful to not break up your chocolate chips.
Finally, once the chocolate and butter mixture has melted, add it to the sugar/oats mixture and beat lightly.
In a separate medium mixing bowl, sift and measure the cake flour, the whole wheat flour, the salt, baking powder, and baking soda. Mix everything together with a spoon.
Now it is time to think—you might not need all of your flour mixture--so pay close attention. Add half of your flour mix to the wet mix and beat it all together with the mixer. Take a spatula and scrape the sides of the bowl to get the dry stuff off of the edges. Keep adding the flour mixture a little at a time and beating it with the mixer until you have a very stiff dough.
As I said, you might not need all of the flour, depending on room temperature and your accuracy of measuring the ingredients.
I said VERY stiff dough...it's important.
When you are satisfied with your dough, cover the mixture with Saran Wrap and sit it in the refrigerator for ten or fifteen minutes to chill. Preheat your oven to 375 degrees F. Open a beer or mix yourself a drink while you wait.
Redneck Tip: My Betty Crocker Cookbook had another idea I liked. Instead of cooking a whole batch of bad cookies, spoon out a little ball of your dough on to a cookie sheet and test-cook one cookie to see what you’ve got. If your cookie spreads out too much and is flat, add a little flour to your mix. If it is too dry and cooks like a golf ball, add a little more butter, a dash of milk, or another egg and try again. Mine worked great the first try. Also, allow your cookie sheets to cool off between batches so that your cookies don’t spread too much while cooking—remember, that’s why we chilled the dough in the first place…
Spoon out even globs of your cookie dough onto your cookie sheets. I wanted real thick, 4” cookies, so I used big portions. I left the dough in even globs--almost "balls" of dough standing up 1-1/2" to 2" high. Trust me here. The dough will spread out as it cooks, but the cookies will still be almost 1/2" thick when you're done.
For large cookies, cook them for fifteen to seventeen minutes, until you see the sides of the bottoms starting to get real dark.
Allow the cookies to cool on the cookie sheet for a few minutes, then slide them off onto a cooling rack. Repeat the cooking process until you run out of dough, or make some more dough and keep going.
I made about a dozen and one-half 4" diameter, super fat cookies, and between the real estate agents and other victims I ran into today, I only have four left.
I had ZERO complaints.
YOU BETTER TRY MAKING THESE COOKIES, DARN IT...
Enjoy Y’all,
The Redneck Gourmet
Monday, September 26, 2005
Kahlua
I enjoy a good coffee drink. The only problem is that liquors like Kahlua and Amaretto cost a pretty penny. Try buying a couple of Irish Coffees or other "adult" coffee drinks in a bar or restaurant and you'll find yourself having to take out a loan to pay the tab.
Years ago I had some German friends in Atlanta that made their own kahlua. It was good rendition of the store bought stuff, and I always wanted to try to figgure out how to do it myself.
I did a little research and found a number of recipes for making Kahlua on the Internet, so I’ve started making it and adding a little “kick” of my own. Instead of 40 proof (20% alcohol), I expect mine comes out somewhere between 80 and 100 proof.
You’ll need the following ingredients:
2 cups water
6 tbsp coffee
¼ tsp cinnamon
2 cups water
1-1/2 cup sugar
2 tbsp vanilla extract
1 dash of red pepper
1 dash of nutmeg
3 cups golden grain alcohol
Now roll up your sleeves and let’s get to work.
First make yourself a small pot of extra strong coffee. Let it cool off well.
Meanwhile, in a medium boiler heat the water, sugar, and spices until boiling, then turn off the heat and let the mixture cool completely.
Once everything has cooled, add the coffee to the water/sugar/spice mixture, then add your grain alcohol.
BE VERY CAREFUL WHEN HANDLING GRAIN ALCOHOL, unless you want your friends and family to see you on the evening news.
Let your mixture sit overnight, then bottle it in an old wine bottle or a new decorative bottle.
Enjoy Y’all,
The Redneck Gourmet
Thursday, September 22, 2005
Funky Mandarin Stir-Fry
From my fridge/pantry to the table in less than an hour…
I’ve done enough stir fry over the past couple of years to be comfortable making up my own variations on the theme. For those of you that haven’t tried it, stir fry is basically a bunch of stuff tossed in a medium hot skillet (or wok) and cooked until it is as done as you like, then seasoned with Soy sauce and thickened with a mixture of water and corn starch.
It’s just that easy, and it’s hard to come up with something that doesn’t taste edible as long as you keep your old dirty sneakers and your pets out of the mixture.
Tonight I did a little fridge and pantry shopping and I tossed everything that looked like it would be good in a stir fry out on the counter.
When I was done with my "in house" shopping trip, here is what I had to work with:
½ pound boneless skinless chicken thighs
2 tbsp soy sauce
¼ head of green cabbage, shredded
½ yellow bell pepper, julienned
½ red bell pepper, Julianned
1 medium carrot, Julianned
1” piece of fresh ginger, diced fine
2 cloves garlic, diced fine
(1) 11 oz can mandarin orange segments
1/2 can bamboo shoots
(1) 14 oz can baby corn, drained and cut in half
2/3 cup frozen English peas (or snow peas or whatever you got)
2 tbsp peanut oil
3 tbsp soy sauce
1 tsp fish sauce
1 tsp toasted sesame oil
¼ orange juice
A couple of dashes of red pepper (to YOUR taste—be careful)
¼ cup warm water
1 tbsp corn starch
1-1/2 cup white rice, cooked
First cut up your chicken into one or two bite pieces, place the pieces in a zip lock baggie, and add a couple tablespoons worth of soy sauce. Work everything around with your hands and let the chicken marinade in the baggie for a half hour or so.
While your chicken is marinating, dice up your veggies and heat up your skillet a little.
You can also put your rice on to cook when you start cooking your chicken. Don’t forget your rice like I always try to do.
Now pour the peanut oil in the skillet, let it heat up good, and stir fry the chicken until it is done medium well. Add the diced garlic when the chicken is half done. Don’t burn your garlic unless you want "truely funky stir fry."
Turn down the heat slightly and reserve the chicken on the side while you stir fry your veggies.
Toss in the cabbage and pour in the orange juice and a table spoon of Soy sauce. Stir the cabbage as it sizzles away. After a couple of minutes, add your bell peppers, peas, and carrots. Keep stirring. Now add the fish sauce and the toasted sesame sauce, along with the baby corn and the bamboo shoots.
Keep stirring for a few more minutes. Check your rice and open your can of mandarin orange segments. Keep stirring—why do you think that they call it stir fry anyway?
Now add your chicken back into the mixture, along with the mandarin orange segments, and stir everything together good. Take a taste of the veggies to check your seasoning.
Does it need anything? Well add it then, it’s your dinner.
Stir up the corn starch with the warm water real good, then pour half into the mixture and stir it up. Now add the rest of the water/corn starch mixture and let everything simmer as it thickens up.
Place a couple of big bowls on chargers, spoon in half your rice into each bowl, top the rice with your stir fry mixture, grab yourself a fork or better yet, some chop sticks, and EAT.
Enjoy Y’all,
The Redneck Gourmet
Monday, September 19, 2005
Rib Re-runs
Well, I did them again after letting them spend two days in a spicy brine.
Remember my Baby Back Pork Ribs that I cooked a couple of times earlier this summer?
Unfortunately my health continues to limit my kitchen endeavors, but I did manage to find the ribs on sale this past week and while one rack is comfortably resting frozen in the freezer, the second rack made dinner Sunday night.
I'm quite serious when I say that you should experiment with the brining mixture. This time I just winged it--1 and 1/2 gallon cold water, 1 cup white vinegar, 1/2 cup apple cider vinegar, 1/2 cup salt, 3/4 cup sugar, 2 tbsp black peppercorns, and ...... the piece de resistance...
1 tbsp red pepper flakes.
Man, was this mixture ever spicy--particularly after two days of soaking.
I've made these little rib racks thingies out of wire coathangers that work well keeping the ribs standing on edge over a pan of water while they cooked indirectly on my charcoal grill. I'll post a drawing and some pictures later so you can make your own.
I appreciate you continuing to bear with me as I recover from my malady.
Regards Y'all,
The Redneck Gourmet
Monday, September 12, 2005
General Tsao's Chicken
I'm Baaaaccckkk…
Yes ladies and gentlemen, I’ve somewhat recovered from the disastrous month of August and my bout with intestinal ischemia—blood clots in my abdomen. I was lucky that I threw in the towel when I did and allowed my mother to take me in for medical treatment or they say that I’d be upstairs cooking with Justin Wilson and Julia Child right now. Thank God we live in 2005 rather than 1905 or my prognosis would have been quite different. Fortunately, I’m a number of pounds lighter, but hardly worse for the wear and ready to get back in the kitchen.
My appetite has been slowly returning and I actually cooked dinner the past couple of days—nothing fancy, just some frozen veggies and a pre-roasted grocery store chicken breast. I think that it’s time for something spicy to test out the old gastrointestinal tract.
Tonight I fired up the stovetop and on the menu was General Tsao’s Chicken. I guess almost everyone has had some variation of this dish if you have ever had carry out Chinese in a large city, but I did a little research and found this entertaining Washington Post article telling us a little more about the dish’s namesake.
Yes, there really was a guy named General Tsao (generally pronounced “Sow”.) He was actually named Tsao Tsungtang and he lived in China between 1812 and 1885. How the spicy chicken dish actually came to be named for the good General is a matter of wide speculation, but I found it interesting to read the article as I made my recipe preparations.
Authentic recipes used in the restaurants use dark meat chicken, but I also found recipes that called for using chicken breast meat. I compromised and used some Perdue boneless chicken thighs that I found very reasonably priced and had never used before.
For my version of “General Tsao’s Chicken, you will need:
1-1/2 pounds Chicken (boneless chicken breast halves, thighs, or whatever)
1/4 cup soy sauce
1/2 teaspoon ground white pepper
1 egg, beaten
1/2 cup cornstarch
1/2 cup vegetable oil
1 cup chopped green onions
1 tsp red pepper flakes (or as many as you like, be careful)
For the Sauce:
1/4 cup cornstarch
1/3 cup water
1 teaspoon minced garlic
1 teaspoon minced fresh ginger root
3/8 cup white sugar
1/8 cup soy sauce
1/8 cup rice wine vinegar
`/8 cup white wine or sake
1/4 cup hot chicken broth
Make the sauce first. Combine the cornstarch and water in a mixing bowl and stir together. Now add the sugar, soy sauce, white wine vinegar, white wine, and the chicken broth. Stir it all up, and refrigerate—over night if you want.
When you are ready to cook, preheat a skillet to 350 degrees.
Cut up your chicken meat into bite sized pieces (two bites at a maximum) and place it in a medium mixing bowl. Add the soy sauce and white pepper, and then stir in the beaten egg. Add the cornstarch and toss the chicken pieces to coat, and then stir in the vegetable oil to separate the pieces
Add the chicken in small batches to the skillet and stir fry until crispy. Drain the cooked chicken on the side on paper towels.
Did I mention making some rice? Well, make yourself some rice if you want—it’s your dinner.
Puttin’ it all together…Add a tablespoon of oil to the skillet and allow it to come up to temperature, then add the pepper flakes and green onions and stir fry briefly. Remove the sauce from the fridge, stir it up, and add it to the skillet along with the chicken pieces and cook until the sauce thickens and everything has heated though.
Get out a couple of bowls, spoon in some rice, and serve the General’s chicken and sauce on top. Teach yourself to use chopsticks while you’re at it—I’m still training Pat.
Enjoy Y’all,
The Redneck Gourmet
Thursday, September 01, 2005
Hospital Food
Sorry for my absence--it wasn't by choice...
I'm happy to report that I survived 9 days in intensive care and 6 days in a regular hospital room, and a clear liquid diet is even less attractive today than it was before I landed in the emergency room on August 17th.
The medical diagnosis was that I had a series of blood clots develop in the veins between my intestines, liver, and kidneys. Without boring you with the details, I have fought hyper-coagulativity problems for the past 21 years with the only previous symptoms developing in my legs.
Not any more, however.
I will live the rest of my life, such is it is, taking the blood thinner Coumadin. So much for eating a bunch of collard greens or other leafy green vegetables containing vitamin K that affects blood clotting factors.
The good news was that the stove got fixed before I was admitted into the hospital, Hurricane Katrina missed our South Alabama farm by about four counties, and I hope to be back home on St. Simons this weekend. My appetite is returning and I'm looking forward to grilling some pork or chicken over the Labor Day holiday. I'll try to have something new to post as a result of my efforts.
Hope everyone has a good holiday weekend. Pray for the storm victims--they need all the help they can get.
Regards Y'all,
The Redneck Gourmet
Tuesday, August 09, 2005
Campfire Cooking—Part Deaux
Kosher salt baked potatoes
Our epic saga continues. It’s day six of the broken stove chronicles—but the good news is that service guy just got here as I started writing.
Even if he fixes the stove, I already have made preparations to grill burgers, Portobello mushrooms, and corn on the cob for tonight’s dinner.
I did baked potatoes on the grill again last night in a cast iron skillet, without covering them with aluminum foil. That’s right, no foil, in a skillet.
What you do is pour a thin layer of kosher salt in the bottom of the skillet, place your potatoes in the skillet, and dump the rest of the box of kosher salt on top of and around the potatoes. Cover them up entirely, with a top ¼” thick layer of salt.
Now toss your potatoes on the grill for about an hour while you cook the rest of your dinner.
Pull the skillet off of the grill and let things cool down for a minute or two, then poke around in the salt with a fork and you’ll find your potatoes clumped together, encased in a crusty shell of salt.
Break open the shell, dust off the potatoes, put them on your plate, and EAT.
Enjoy Y’all,
The Redneck Gourmet
Sunday, August 07, 2005
Grilled Snow Crab Legs
Get Ready To Be Amazed...
Sunday afternoon was fairly mild here on the island of St. Simons on the Georgia coast.
The flys and other bugs gave us a break at the pool and the weather was only moderately threatening on and off. The only ominous thing I was facing was--with the oven still out of service--dinner was to be cooked outside, AGAIN, with...
CHARCOAL.
Coincidentally, in wandering through the grocery store yesterday I was swept up into a fit of buying. They had whole pork tenderloins and snow crab clusters on sale for LESS THAN HALF PRICE.
The fridge and freezer is full as we speak.
Then tonight I wanted to eat Snow Crab clusters, but I had to do them on the grill.
So I did...
I have always had lobster and crab steamed or boiled, but never grilled. That said, I can personally testify that I will probably never boil or steam crab legs ever again.
You need to try it for yourself, and to make dinner for two on the grill, you'll need:
Eight or ten frozen snow crab clusters (or Dungeness or Alaskan King crab)
1 stick of butter
1 or 2 lemons
Now as to the preparations:
First toss your frozen crab in a large boiler and cover with water and a few splashes of lemon juice to thaw.
Change the water once to reduce the smell and improve the flavor.
Let everything soak for three or four hours if you want to.
Now fire up the grill.
Put the butter in a small boiler and melt it on the stove (or the grill if your stove is broken like mine...) Scoop off the solids that float to the top.
Now you have "drawn butter."
Remove your crab clusters from the water and let them drain on a a pile of paper towels in a pan or on a cookie sheet.
After they have drained, brush both sides of each cluster with oilve oil. Sprinkle them with a little salt and pepper or better yet, some Old Bay Seasoning.
Place the clusters on the grill for three or four minutes on each side, then pull them off the grill onto a platter with the sliced lemon wedges, get yourself a couple of plates and a roll of paper towels each, sit down at the table, and EAT.
Regards Y'all,
The Redneck Gourmet
Friday, August 05, 2005
Campfire Cooking
Well, if finally broke completely...
Our stove, that is.
It's been acting strange since New Years and has functioned intermittantly, causing us to start turning the circuit breaker off when it was not in use.
This past Wednesday morning it wouldn't turn on at all, as I found out when I tried to heat water to make Green Tea.
I opened up the control panel back in January and couldn't find anything, and when I put it back together it worked perfectly for a few weeks. We've been trying to not hassle the condo owner, but I put a note in the with rent check and I hope to hear from him this weekend (he lives in Pennsylvania.)
Meanwhile I've been doing what little cooking I've done on the grill for dinner in the evenings.
Please stay tuned for more recipes once whe get the stove fixed or replaced.
Sorry Y'all,
The Redneck Gourmet
Sunday, July 24, 2005
Breakfast Casserole
Well folks, we’re entertaining relatives again this week, and I, your lovely and talented cooking blogger and chef, am providing lots of food to serve to everyone for breakfast, lunch, and dinner. We’re eating out some, but I have an elaborate menu planned for the next five days and my fridge and pantry is bursting at the seams with ingredients.
Today, while Pat and our two guests were baking their brains out at the pool in the 95 degree weather with 110 degree heat index, I was hiding in the kitchen making slaw and potato salad and prepping ribs for the grill for dinner.
The bad news is that I managed to stop up the drain in the kitchen sink for the third time in the past 15 months, this time with left over veggie parts I put down the food disposal. Why have a disposal if you can’t put anything solid down it, you know?
Anyone know a good plumber?
Any way…I have rarely posted any breakfast recipes in the past, other than last November’s Oven Puff Pancake writing, but tonight I have a simple little ditty based on this recipe. It is easy to put together in advance and let set overnight in the fridge before you pop it in the oven in the morning.
Here is what you need to do to make breakfast for four, with a little left over for kids or seconds:
1 pound of spicy hot sausage
½ red bell pepper, diced
½ medium onion, diced
½ stick of semi-sweet, unsalted butter
5 pieces of bread (your choice, I used “five grain” with the crust)
1 cup shredded cheddar cheese
7 eggs
2 cups half and half
1 tsp black pepper
1 tsp salt
Here is the process to put it all together:
Melt your butter in a 9”x9” casserole dish (sprayed well with non-stick cooking spray) in the oven or on the stovetop.
Toss a large, heavy skillet on the stove over medium low heat. Put your sausage in the skillet and start cooking it toward brown.
Dice your onion and bell pepper and add it to the skillet and keep cooking until the sausage is brown and the onion and bell pepper are well done.
Turn off the heat, tilt the skillet over on the edge of the eye to drain off the grease, and let the mixture cool off.
When the butter has melted, tear up your pieces of bread into dime sized pieces and put them in the casserole dish on top of the butter. Make an even layer of bread chunks.
Meanwhile, while your sausage is cooling, stir up your eggs and half and half in a small mixing bowl, and add your salt and pepper.
Sprinkle a layer of your shredded cheese over the layer of bread.
After the sausage has cooled and drained a little, spoon it out in a layer on top of the cheese, then pour your eggs evenly on top of everything.
Guess what?
You're done, except letting the dish sit at least a few hours or preferably overnight in the fridge, then cooking it until done in a 350 degree oven, about 45 minutes at my house.
Enjoy Y’all,
The Redneck Gourmet
Friday, July 22, 2005
Welcome Carnival of Recipe Readers
Welcome ladies and gentlemen!
Come on inside and sit a spell, take your shoes off, and look around a little...
Maybe try out some of my BBQ recipes, if you will.
Thanks to Dave over at The Glittering Eye for his efforts in puttin' everything together this week.
If you have the time, stop by my political/current event blog What I'd Liked To Have Said, and see what I have to say about what's going on in the real world--such as it is.
Thursday, July 21, 2005
Tropical Shrimp Stir Fry
Another day in paradise…another dinner to be cooked, and again--I refuse to eat CHICKEN.
We had a couple of pounds of shrimp in the freezer, so I thawed out a few and started thinking about what I wanted to cook…something a little new and different…
I found my inspiration in this recipe. It's not really a true "sweet & sour" style flavor, but more of a mildly sweet shrimp dish with the pineapple juice and the soy sauce comes through a little also. You can "kick it up a notch" by tossing in more red pepper flakes if you like a little more heat--Emeril style, you know?
The original write up was for 12 SERVINGS!! You know me, I only wanted to make dinner for two, so here is what you will need to do what I did tonight:
½ pound Peeled and De-veined Shrimp
For the Shrimp marinade:
juice from ½ large lemon (no seeds please)
2 tbsp soy sauce
1/4 tbsp rice wine vinegar
For the rest of the Stir Fry:
2 Tbsp vegetable oil (peanut or canola oil—your choice)
1/2 cup water
1-1/2 cups broccoli florets
1/2 red bell pepper, cut into strips
6 or 8 shitaki mushrooms, sliced
1/2 cup pineapple juice
1 tbsp soy sauce
1/4 cup brown sugar
1/4 tsp ground ginger
1/2 tbsp rice vinegar
pinch crushed red pepper
2 tsp cornstarch dissolved in ¼ cup water
1 small can chunked pineapple, drained (use juice above)
1/4 cup slivered almonds, toasted
2 cups cooked rice
Now, as to the procedure:
Peel and de-vein your shrimp and place them in a small mixing bowl. Add your lemon juice, the soy sauce, and the rice wine vinegar. Let your shrimp swim around in the bowl in the fridge for a half hour or so—mine went a little over an hour.
While the shrimp are marinadeing, slice up your vegetables.
After the shrimp marinaded, heat a large heavy skillet over medium heat, and add your oil. When your oil has come up to temperature, toss in your shrimp and stir fry them for a couple of minutes on each side until they start turning pink, then remove them to a bowl and reserve on the side.
Now add a ½ cup of water and bring it to a simmer and add your broccoli. Be careful to adjust your heat so the water doesn’t boil. Cook the broccoli for a couple of minutes or so, then add your bell pepper and mushrooms and keep simmering.
Place two large pasta bowls in the oven to preheat, get out your chargers, and start cooking your rice.
Mix together the pineapple juice, the remaining water, soy sauce, brown sugar, ginger, vinegar, crushed pepper, and cornstarch mixture and pour it over your cooking vegetables.
Keep cooking everything until the sauce bubbles and thickens—that’s what the cornstarch does for you.
When your sauce is about done, add your shrimp back in the skillet along with the pineapple chunks and stir everything up. Cook another couple of minutes, but try not to over cook your shrimp.
Put some rice in your bowls, spoon your stir fry over your rice, sprinkle with almonds, sit down at the table, and EAT.
Enjoy Y’all,
The Redneck Gourmet
Tuesday, July 19, 2005
Shrimp Creole
OK, it happened accidentally.
I did NOT want to go to the grocery store today. I also did NOT want to eat chicken for dinner.
I started early (10:00 AM) thinking about and looking for something new to cook, and it could only involve things that we already had in our pantry and fridge.
I found it about 10:30 in my Betty Crocker cookbook—Shrimp Creole.
I checked our cooking inventory and guess what? We had all of the stuff already in stock, but of course "I" couldn’t just use the simple Betty Crocker recipe.
With the idea in mind, next I did a Google search and found this incredibly elaborate recipe and this slightly more realistic listing of ingredients. The only problem was that both recipes (and most of the others I found) made enough food for 6 or 8 people…
I’m cooking for only two people, remember?
So here is what you need to do what I did tonight:
2 tbsp corn oil (I was out of olive oil...AAAHHHH)
1 tbsp butter
2 tbsp all purpose flour (plus a little more in case you need it)
½ colored bell pepper (I used red) diced
¼ Vidalia onion, diced
¼ red onion, diced
1 stalk celery, diced
15 oz can diced tomatoes
7 oz can tomato sauce (no salt)
15 oz can chicken broth
½ pound (about 10 or 12) medium shrimp, peeled and de-veined
And finally, some store- bought or home-made Creole seasoning. (I made my own in a big batch.)
Here is what I did with all of the above stuff to make a hearty dinner for two:
First, peal and de-vein your shrimp if you didn’t buy them that way. Toss them in a bowl, squeeze a little lemon juice over them, a dash of Worcestershire, add a tablespoon of olive oil, and sprinkle lightly with your Creole seasoning. Toss the shrimp to coat evenly and refrigerate them while they (the shrimp) swim around and get all tasty and comfortable.
Next I made what my Cajun friends would call a “blond” roux.
To do this, heat a small skillet on the stovetop over medium low heat, melt your butter, add your 2 tbsp of oil, and sprinkle in your flour until it is all mixed together. Now stand at the stove and pay attention, stirring virtually continuously as the mixture browns and thickens. Watch the temperature—you burn it—you start all over from scratch.
Cook your roux for at least 15 or 20 minutes, until it is a nice blond color.
Now turn off the heat and let your roux cool down while you dice your vegetables. Using a large, heavy skillet, splash in a bit of vegetable oil and add your onion. Sautee the onion for 10 or 15 minutes.
Now add the celery and bell pepper to the skillet with your onion and continue cooking for another 10 minutes.
After the vegetables are cooked, spoon in your “blond” roux and splash in a bit of chicken broth, along with the diced tomatoes, and the tomato sauce. Also add 1 teaspoon of your Creole Seasoning
Redneck Tip: Add more seasoning if you want, but be careful now...don't hurt yourself...
Crank up the heat to medium and bring things to a low simmer. If you have the time to cook, why not thin things out real good with the rest of the chicken stock, but allow at least 45 minutes to cook things back down nice and thick. Turn the heat down to medium low and keep a lid on your skillet to slow things down a little.
Now let me ask you a question: “You know how to make rice?”
You do?
Well make yourself a batch—instant or whatever. I made a couple of cups worth of Mahatma brand.
When the Creole sauce has cooked down to the consistency of a thin gravy, pull your shrimp out of the fridge and toss them into the mix for ten or fifteen minutes. By the way--taste your sauce.
Does it need anything?
Well add it then--it's your dinner.
Make sure that you stir it all up real good. When you are satisfied with the results (or too hungry to wait any longer), dip out some rice into a bowl, ladle some sauce and shrimp on top, slice up a Baggett to dip, and EAT.
Enjoy Y’all,
The Redneck Gourmet
On Tonight's Menu...
Shrimp Creole...
Please stop back by later tonight for the details. Meanwhile--I've got to go make a "blond" Roux.
Don't you wish you were dining with me on St. Simons tonight?
Please stop back by later tonight for the details. Meanwhile--I've got to go make a "blond" Roux.
Don't you wish you were dining with me on St. Simons tonight?
Sunday, July 10, 2005
Bacon Wrapped Stuffed Chicken Breasts
With Grilled Yellow Corn And Sweet Potatoes
This meal was an accidental group effort on the charcoal grill. We already had two ears of yellow corn and one large sweet potato that I had purchased earlier last week. Last Thursday afternoon Pat sent me to the grocery store with a demand for some items including boneless skinless chicken breasts if they could be had for less than $10 each.
We were in luck--they were on sale—buy one, get one free. (I think that we call that deal “half price” in Alabama.)
Any way, I arrived home with the chicken and the inevitable extra impulse items that I always buy like spices and such, and the next task was to decide how to cook the chicken.
We eat so much of it (chicken), we’re finding it (chicken) to be a little B-O-R-I-N-G.
You know?
Can't have that
We soaked the ears of corn with the husks on in a big boiler, and Pat pealed and diced the sweet potato into ¾” cubes, and placed it in a double thickness aluminum foil pack with some brown sugar, butter, and a little olive oil.
I fumbled around lighting the grill and ran back and forth to the computer looking at recipes. We found this one for Bacon Wrapped Chicken that I modified as follows:
The Ingredients:
Two medium chicken breasts
Four slices of thick bacon
4 ounces (½ pack) cream cheese
½ tsp dried tarragon
½ tsp black pepper
1 scallion (green onion) diced
Splash of white truffle oil (if you got it)
The process:
Soak your ears of corn in water for a while, then drain them and wrap them tightly in aluminum foil. Throw them on the grill.
Do the same with your sweet potato cubes (not soaked in water--wrapped in foil…you fool.)
In a small mixing bowl, combine your cream cheese, tarragon, pepper, scallion, and truffle oil and mix well.
Meanwhile, while your potatoes and ears of corn are cooking on the grill, rinse off your chicken breasts and pat them dry on your cutting board. Take a sharp paring knife and slice into the fat side of the breast horizontally to form a nice deep pocket in which to place your cream cheese mixture. Try not to cut all the way through the breast except on one side.
Now spoon your cream cheese mixture into the pocket in the breast and pinch everything tightly closed around it. The cheese mixture will act sort of like glue and hold it closed.
Take two slices of bacon and wrap the whole thing up, and pin the bacon tightly around the breast with two or three toothpicks.
After the corn and potatoes have been on the grill for twenty or twenty five minutes, place your chicken on the grill and let everybody get to know each other. Be sure that you make proper introductions –I hate cooking and eating with total strangers.
Let the chicken cook for about 10 to 12 minutes, then turn it over and give it another 10 minutes or so.
If you have done everything correctly, it should look like this:
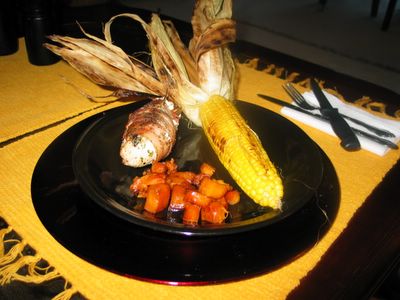
Yummy!!
Enjoy Y'all,
The Redneck Gourmet
Saturday, July 09, 2005
Laughing In The Face of Death
Well, the good news is that Hurricane Dennis isn't coming anywhere near St. Simons this afternoon, and the 5:00 PM National Weather Service forecast track has the storm moving ever so slightly back to the west, AWAY from my mother's property.
We have had a bit of excitement here this afternoon, I had to do an emergency delivery. Here is a picture of the insturments I used:
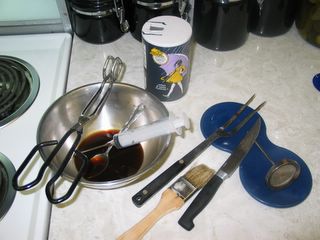
Surgical instruments...
And here is a picture of the results of my efforts (the delivery took almost four hours):

I'ts a Boy...er...I mean a Pork Butt
I'm a proud father of a bouncing 5 pound baby Pork Butt. Don't you wish that you were me?
Here, have a Cigar...
(Please excuse me while I dual post this on both my blogs for my non-political readers)
Saturday, July 02, 2005
Fancy Asian Cold Slaw
Sorry Y’all, but my holiday cooking and entertaining has taken prescient over my writing the past four days, so I’m taking this opportunity to catch up a little.
I don’t necessarily write about everything I cook because some stuff is so elementary, but since I write a cooking blog I do try to outline the trends in my cooking and let people know what I’ve been up to.
I did Beer Butt Chickens last Thursday night for our holiday guests and made red potato salad and cold slaw as side dishes. The cold slaw recipe came out of an old copy of Bon Appetit magazine—the July 1998 print edition. I love the recipe, but I must admit that if you can get three teenaged girls to devour the slaw without objection I must be on to something here.
Here is what I did to make a generous portion of slaw for seven people:
½ head (about 5 cups) of green cabbage
¼ head (about 2-1/2 cups) of red cabbage
1 red bell pepper, cut into matchstick sized strips
1 yellow bell pepper, cut into matchstick sized strips
1 medium carrot, peeled and cut into matchstick sized strips
½ cup fresh cilantro, chopped
4 green onions, cut into matchstick sized strips (optional)
For the preliminary dressing:
4 tbsp rice vinegar
4 tbsp vegetable oil
2 tbsp soy sauce
1-1/2 tbsp golden brown sugar
1 tbsp minced peeled fresh ginger
1 tbsp minced fresh garlic
For the final dressing
4 tbsp rice vinegar
4 tbsp vegetable oil
5 tbsp smooth peanut butter
2 tbsp soy sauce
1-1/2 tbsp golden brown sugar
1 tbsp minced peeled fresh ginger
1 tbsp minced fresh garlic
Prepare your cabbage with a food processor or by hand. I used the food processor. Take the time to julienne by hand the bell peppers, carrot, and onions because your efforts will make a beautiful presentation. Use the food processor for everything if you must.
Whisk the six ingredients for the preliminary dressing together in a small bowl and let stand at room temperature for a half hour, then toss it with your vegetables.
Whisk the seven ingredients for the final dressing together in your bowl and leave it sitting out at room temperature while your veggies sit in the fridge for an hour or two.
When you fire up your grill, toss the final dressing with the slaw and refrigerate everything until you are ready to eat.
Enjoy Y’all,
The Redneck Gourmet
Beer Butt Chicken
I’m used to cooking for only two people most of the time—at most two couples.
That isn’t my present circumstance, however.I’m cooking for SEVEN—four adults and three hungry teen girls that seem to want a snack every hour, on the hour.
While a couple pounds of lunch meat and cheese and a few loaves of bread can take care of lunch, dinner is another matter entirely.
My solution, when the going gets tough, the tough crack out…
THE CHARCOAL GRILL.
I’m what you call a Grill Snob. A so called purist…I’m a charcoal man through and through, and I absolutely refuse to use any petroleum products in association with my grilling.
No Propane. No lighter fluid. I have an electric resistance starter for my charcoal. It takes a little longer, but your food doesn’t smell like a diesel truck transmission when you get through cooking it.
There is usually some beer involved in the process, however, and yesterday I found a new use for beer in association with grilling. I cooked something called beer butt chicken—two four pounders—for dinner.
Did I mention that they were delicious?
And really moist?
Well they were.
That is the point in cooking beer butts. You pour ¼ of the beer in each can out into an aluminum pan, stick the beer can with the rest of the beer into the cavity in the chicken, and sit the whole shebang on the grill. The beer in the can boils out while you are cooking and keeps the bird nice and juicy, while the beer in the pan evaporates and keeps the outside wet.
My chickens spent the night before cooking in a nice brine solution, then I did my spicy BBQ rub on one and cooked the other plain (other than a little salt and pepper.) I served my home made Kansas City style BBQ sauce on the side, along with a fancy Asian cold slaw and Red Potato salad.
Don't you wish you were hanging out on St. Simons Island with me this weekend?
Sunday, June 26, 2005
Ham & Asparagus Crepes
Some people say “real men don’t eat Crepes.”
Not me—I love Crepes.
I’d rather cook and eat Crepes than spend my time being a creep like some men that say “real men don’t eat Crepes.
Know what I mean?
I’ve been cooking crepes and serving them for brunch every few months for the past three years or so. They are not hard—just slightly intimidating in their own special way.
The basic recipe is pretty standard, but I found these guys to have the best description of the actual process involved in cooking your crepes.
While my recipe is designed to make four or five medium crepes—enough to serve breakfast for two—it only takes slightly longer to make twenty crepes.
My ingredients were:
For the Crepes:
½ cup of milk
2 eggs
1/3 cup of flour
A pinch of salt
¼ stick butter
For the filling:
8 slices deli ham (like you’d use on a sandwich)
1 can Green Giant Asparagus
½ block cream cheese
For the sauce:
1 package Knorr Hollandaise sauce mix
Start out by slowly melting ¼ stick of butter in a small boiler over medium heat.
Next, let your milk and eggs sit out on the counter top for a half hour to warm up. Sift and measure your flour into a mixing bowl, then whisk together the milk and eggs and add them to your flour and salt. Mix everything up real good with an electric mixer or in the blender, and then let it sit a few minutes to let the bubbles settle out.
Heat your Crepe pan or a medium skillet over medium low heat. On my stovetop the setting is about 2-3/4 on a scale of 1 to 10.
Once the skillet has heated up, brush it lightly with some of your melted butter and then pour ¼ cup of your batter mixture into the middle of the skillet and tilt the skillet around to get a thin, even circular puddle.
Redneck Tip: If your are not sure of the skillet temperature, pour just a little silver dollar size puddle out in the skillet, saving the rest of the batter for your next effort until you see if the skillet is too hot or too cold (mine was too hot the first time and I threw away a whole Crepe.)
Cook each crepe about two or three minutes until the edges start to curl upward, then carefully lift it with a metal spatula and flip it over in the skillet. Cook it about another minute, and then place it on a plate on the side.
Keep brushing out the butter and cooking crepes until you run out of batter, paying attention that the skillet doesn’t cool off too much or overheat and burn your Crepes.
Preheat the oven to 350 degrees F and pre grease a 9”x9” Pyrex dish.
The filling part of this recipe is really easy. Lay a Crepe in the middle of a clean plate. Cover two thirds of it with two pieces of sliced ham. Lay two or three pieces of canned Asparagus side by side in the middle of the ham. Place two pieces of crème cheese end to end on top of the Asparagus, roll your filled crepe up, and place it in your baking dish.
When the Crepes are all rolled up and in the dish, cover the dish tightly with aluminum foil and toss the dish in the oven for 20 minutes.
While your Crepes are baking, make up your Knorr sauce or a homemade cheese sauce.
After 20 minutes or so, pull the foil off the dish and let things cook uncovered another five minutes while your stir your sauce.
Pull the dish out of the oven, place two crepes in the middle of your plate, spoon out some of your sauce, sit down at the table, and EAT!
Enjoy Y’all,
The Redneck Gourmet
When Life Gives You Lemons...
Make Lemonaid...
Well, the Blogskin that I've used with "The Redneck Gourmet" since last December somehow lost it's mind while publishing a new recipe on Saturday, and I'm not smart enough to fix the original trashy HTML code contained in the "free template" that I had hardly paid attention to in the past six months.
After about two hours of trying to debug another rocket scientist's coding, I gave up and picked a new skin from blogger. This one needs some work, but the cascading style sheet format and cleaner code is something that I can work with.
After I cook some breakfast and my head stops hurting from trying to debug the old code, I'll try to get the archives section, the links, and the site meter reinstalled.
Wish me luck
The Redneck Gourmet Programmer
Saturday, June 25, 2005
Greek Burritos
I had a pack of ground beef laying in the fridge that I had thawed out on Friday afternoon. I knew that I had to cook it soon else it would go bad, but Pat and I didn’t want hamburgers tonight.
Besides hamburgers and meat loaf, what else can you do with ground beef? Oh, I almost forgot stuffed bell peppers…any way…
A quick Google search yielded this recipe for Greek Pocket Sandwiches. The only problem was, I didn’t have any pita bread in the house. What I did have instead was some large flour tortillas.
Is there such a thing as Greek Burritos? No?
Well, I'd like to take this opportunity to announce that there is now something called “Greek Burritos,” and here is what you need to make four of them:
For the meat filling:
¼ large white onion-diced
¼ large red onion-diced
1 carrot, chopped fine
2 cloves garlic, diced fine
2 tbsp bacon grease (or olive oil)
10 oz ground beef
(1) 8 oz can diced tomatoes
½ small can tomato paste
2/3 can of beef stock
½ tsp cinnamon
½ tsp cumin powder
¼ tsp red pepper
¼ tsp allspice
¼ tsp paprika
¼ tsp salt
For the cucumber yogurt sauce:
½ medium cucumber, seeded and diced super fine
4 oz plain yogurt
garlic powder or one clove fresh garlic, diced super fine
1 scallion, diced (you guessed it) super fine
2 handfuls of organic salad greens if you want a little salad on the side
Now get out your largest heavy skillet and put it and the bacon grease on the stove over medium low heat. Add your diced onions and sauté for five minutes or so. Now add the carrots and keep sautéing.
When the carrots have softened a little, add the garlic and a splash of beef broth. Cook everything for another five minutes or so, then add your ground beef and break it up well with your spatula.
Now add all of your spices.
Redneck Tip: Be careful not to burn off your nose hairs enjoying the spice aroma—keep your face a safe distance away from the skillet.
Continue cooking the beef until it is nicely browned, then tilt your skillet sideways and spoon off any excess grease.
Redneck Tip: I left my grease in my skillet because I have a food induced death wish.
Now add the diced tomatoes, the tomato paste, and pour in some more of your beef stock. Bring everything to a nice low simmer, cover the mixture, and make your dressing.
Place your cucumber in a fine mesh colander and add ½ tsp salt. Let it set for five or ten minutes, then press the cucumber with the back of a large spoon to drain the water, then put your pressed cucumber into a small mixing bowl. Now add the yogurt, garlic, and scallion and stir it all up to combine well. Place it in the fridge to chill.
Place your plates in the oven to pre-heat and get out your chargers. Wrap your tortillas in aluminum foil and toss them in the oven on top of your plates.
Check the meat mixture every five or ten minutes and stir it with your spatula to keep it from sticking. Keep cooking the meat until it is nice and thick, then pull the lid off and cook five minutes more.
Pull the plates out of the oven, place a warm tortilla in the middle, spoon out some of the meat mixture, drizzle some of your sauce down the middle, roll the whole thing up, and EAT.
(Place your greens on a chilled plate on the side and top with some more cucumber sauce if you want a salad.)
Enjoy Y’all,
The Redneck Gourmet.
Saturday, June 18, 2005
Grilled Stuffed Bell Peppers (Updated)
I was wandering around in the produce section of the grocery store today and noticed colored bell peppers on sale--$0.99 each. I love colored bells, so I bought two yellow and two red.
We cook with bell peppers a good deal when they are available for a reasonable price, but I don’t really need four whole peppers diced up right now and I hated to freeze fresh peppers so soon after buying them.
After looking through the fridge and pantry, I decided to make stuffed bell peppers for dinner—on the grill. As you may know, stuffed peppers usually consist of a mixture of meat, spices, and cheese, baked in the oven. Since I didn’t think that the peppers could stand cooking on the grill long enough to get the meat stuffing properly cooked, I precooked the stuffing in the skillet and things worked out well. Regarding ingredients, I used what I used, but you can feel free to experiment with your own combinations of sausage, beef, pork, lamb, and different cheeses like Monterey jack, Swiss, cheddar, you name it.
Here is what you will need to make my version of stuffed colored bell peppers:
Three large colored bell peppers
1 tbsp olive oil
¼ onion, diced fine
1 stalk celery, diced fine
1 clove garlic, pealed and diced very fine
½ lb ground beef
1 tbsp of Worcestershire Sauce
black pepper
1 package Lipton Fiesta Sides Mexican Rice
1 cup shredded mozzarella cheese
First things first—fire up your charcoal grill. I use charcoal with an electric starter—a thing that gets hot like the eye of an electric range—in order to avoid using lighter fluid. I hate eating food that smells like someone poured kerosene on it. Call me a charcoal snob, and use a gas grill if you must…
I ‘ve been using the Lipton Fiesta Sides instant rice for a while now. It produces good results, fast. Cook it according to the package directions (it’s done in 7 minutes); else make your own plain white or brown rice. You’ll need about 1-1/2 to 2 cups of finished rice, regardless of how long it takes to cook.
Heat a large heavy skillet over medium heat, adding your olive oil. Sautee the onions for a couple of minutes, then add the celery and cook another couple of minutes. Now add the garlic and cook until the onions are clear.
While the veggies are sautéing, slice your peppers in half lengthwise and remove the seeds and “gills.” Brush the outside of the peppers with a little olive oil and distribute ½ cup of mozzarella cheese equally inside the pepper halves.
Add the ground beef and Worcestershire Sauce and cook until the beef is lightly browned. Stir in ½ cup of mozzarella cheese, turn off the heat, and let everything cool.
Redneck Update (June 27th): I cooked stuffed bells again this evening and realized that in the original recipe write up I forgot to mention adding the cooked rice to the meat/veggie/cheese mixture at this time. Please accept my appology Ladies and Gentlemen.
Spoon the cooled meat/veggie/cheese/rice mixture into the pepper halves and top with a little extra cheese (I used parmesan.)
Meanwhile back at the grill, spread out your coals (gas grill users—adjust your flame to a height less that three feet) and brush your grill grate with olive oil or spray it with a non-stick spray.
Place the stuffed peppers on the grill and go fix yourself a drink—you’re almost done. Let the peppers cook for ten or fifteen minutes (depends on how hot your grill is), then move them round and turn them 90 degrees and make sure that they are not burning. When you can’t wait any longer, pull them off the grill, place them on a plate, and EAT.
Enjoy Y’all,
The Redneck Gourmet
Thursday, June 16, 2005
Peasant Pasta with Meatballs and Veggie Parmesan Cream Sauce
We had a bad computer day on Wednesday here on St. Simons Island. We’re still suffering from some as yet unidentified problem that Adelphia says is in our PC’s, but we can’t explain since my laptop works OK on our back up dial up connection. Pat’s notebook is on it’s way via Fed-EX back to her corporate IT department for a tune up so we are a one PC family for couple of days.
Adding insult to injury, our condo air conditioner is running at about 50% capacity—in layman’s terms, our interior forecast is slightly warm, with a good chance of cooling down after the sun sets this evening. In the mean time, it’s about 80 degrees.
In an effort to cook dinner and not heat the kitchen up too much with the stove, I looked into doing some sort of quick pasta dish.
This recipe supplied the inspiration for the veggies. I added this simple Parmesan cream sauce. I also did my own variation of Italian meatballs.
Here is what you will need to make a fast dinner for two:
6 oz Assuntine Tricolore Pasta (or penne, rotinni, or other pasta of your choice)
½ lb ground sirloin
1 spicy hot Italian sausage
1 tbsp garlic powder
1 tbsp onion powder
1 tbsp Worcestershire sauce
1 egg
1 tsp black pepper
Breadcrumbs
1 stick semi-sweet unsalted butter
¼ cup diced red bell pepper
1 carrot, sliced thin
1 cup heavy cream
fresh ground black pepper
OK, no fooling around here—we’re in a hurry. Fill a medium boiler with a couple of quarts of water and place it on the stove on medium heat.
Also toss your largest heavy skillet on the stove on medium heat and add a splash of olive oil.
In a medium mixing bowl, combine your Italian sausage, ground beef, and the egg. Now add your spices and the Worcestershire sauce and mix everything up real well. Add a little breadcrumbs to stiffen things up. The amount of breadcrumbs will vary based on the amount of fat in your ground beef—I used about two tablespoons.
Now scoop out some of the meat mixture and make yourself eight or ten small meatballs. Pinch a chunk of meat mixture out and roll it up in a ball in your hands and place the meatball in the skillet.
When you have all of the meatballs made and they are cooking along, carefully lift and turn them several times to brown nicely on the outside and ensure that they are done at least medium well inside. When they are all cooked, pull the meatballs out and place them on a plate on the side.
By now your water should be boiling. Add a teaspoon of salt, a drizzle of olive oil, and dump in your pasta to cook based on the package instructions. I like mine al dente.
Turn the heat down on the skillet slightly and add ¼ stick of butter. As your butter melts, scrape the skillet to break loose the flavorful chunks of meat left over from cooking your meatballs. Add your red bell pepper and carrot and sauté until tender, then add the rest of the butter and kick the heat back up slightly until the butter is melted and starting to bubble.
Pour in the cream and do not walk away from the stove until you are finished cooking. You have to watch and stir this mixture almost continuously or you WILL burn it and will be stuck eating McDonalds burgers for dinner. We can’t have that, can we?
As your cream sauce starts to thicken, add your meatballs back in and keep stirring. Add a couple of twists of fresh ground black pepper. Keep stirring.
Place your pasta bowls in the oven to preheat.
When your pasta is done, pour it into a colander and drain it well, then dump it into the skillet with the meatballs and sauce. Let everything cook another couple of minutes.
Pull your pasta bowls out of the oven, place them on chargers, pour half of your mixture into each bowl, grab couple of forks, and EAT.
Enjoy Y’all,
The Redneck Gourmet
Thursday, June 09, 2005
Dutch Noodle Soup
Pat and I are traveling on vacation this week so I haven’t had many chances to cook—but I have had plenty of chances to eat some good food. Lots of Polish and German influenced food like sour kraut, sausages, perogies, chipped ham—things that you can’t get in Georgia—at least not in the quality that they have here in Pennsylvania.
Pat’s daughter, Kris, cooked this old Kovach family recipe called Dutch Noodle Soup for us the evening we arrived. It was excellent.
Here is what you will need:
3 lb beef roast
1 large onion, diced
4 or 5 carrots, diced
4 stalks celery, diced
a handful of fresh parsley, chopped
salt to taste
fresh ground black pepper
paprika
basil
oregano
1 bay leaf
2 large cans pureed tomatoes
For the “Noodles”:
5 to 7 cups flour
6 eggs
¾ cup warm water
For the “Noodle filling”:
2 lbs sausage
1 small onion, diced fine
1 egg
First you need to cook your roast. Place it in a 6 quart boiler and add enough water to cover the roast about half way. Add your onion, carrots, celery, parsley, salt (watch the quantity), a couple twists of fresh black pepper, and the rest of your spices.
Kick on the heat to medium high and bring everything to a low boil, then back the heat off to a simmer and add your tomatoes. Now cover the pot and let the roast slow cook for a couple of hours. After two hours, check the roast and keep cooking until it is tender and falls apart easily.
Turn off the heat, remove your roast to a plate, and let everything cool down a little while you make your noodle filling and dough.
For the filling, combine the sausage, onion, and egg in a large mixing bowl and stir it all up well to combine.
In another mixing bowl, start out with five cups of flour, reserving two cups to add if you need it for consistency. Make a hole in the middle of your pile of flour, add your eggs, and start mixing. When everything is combined well, start drizzling in your warm water. Did I say keep mixing? You want the dough to be slightly sticky so go easy on the water. If you get things too thin, just add a little more flour to thicken things up.
Now lightly flour your working surface and place 1/6th of the dough in the middle and roll it out evenly until it is a very thin circle—1/8” thick or so.
Place 1/6th of your sausage filling in the middle of the dough circle and spread it out so that it nearly covers the entire area of the dough. Now roll up your noodle dough around the sausage to form a long tube and slice the tube into ¾” pieces.
Meanwhile, back with the roast, after it has cooled off, pick through the meat and remove any pieces of fat or bone that you don’t want to eat. Tear the meat up into chunks not larger than 1” or so.
Now put the meat and your noodles back in the pot with the liquid you cooked the roast in and add an additional 2 or 3 quarts of water to the pot. Turn the heat back on and bring it back to a low simmer and cook for an additional hour to hour and one half, longer if you have the time.
When you run out of patience, turn off the heat, dip some soup out into bowls, grab a soup spoon, and EAT.
Enjoy Y’all,
The Redneck Gourmet
Friday, June 03, 2005
The Galloping Redneck Gourmet
The Redneck Gourmet is going to be the Galloping Gourmet for ten days beginning Saturday. Wish us good weather, on-time airline flights, and a clean rental car.
We’ll be traveling to Pittsburg and Erie, Pennsylvania; Charleston, West Virginia; and a tiny town in Southern Ohio that you’ve probably never heard of—all family related. It’s funny how that, even though you live on an island with a swimming pool and beach, none of your relatives can ever manage to get off their butts and visit you—you have to come to them, you know?
The good news is that there are a number of good restaurants we get to dine at, including Joe Fazio’s, a well-known Italian place in Charleston that has served national celebrities and politicians for over fifty years.
The bad news is, in addition to either no Internet access in some homes or slow dial up service in some of the hotels, I won’t have any pots, pans, and spices unless I can kick someone out of their kitchen to cook a meal, and experimentation will probably be out of the question, so my posting will be light over this period of time.
I’ll try to give a couple of updates and please check back here to The Redneck Gourmet when I get back in town to see what I’ve been up to.
Regards Y’all,
The Redneck Gourmet
Thursday, June 02, 2005
Spicy Stuffed Blue Cheese Burgers
I love strong flavored cheeses like Blue Cheese. Our local grocer has a good assortment of cheeses and I often splurge on Brie, localetti Romano/Parmesan, and really good blue cheese in a solid block.
It can get sort of pricy, but I think that it is worth the cost. With our current emphasis on grilling, last Sunday I decided to copy something I saw Emeril do on Food Network.
To make three large burgers, you will need:
1-1/4 pounds of 90% lean ground beef
8 to 10 ounces of chunk blue cheese
1 egg
¼ medium onion, diced fine
2 tbsp Worcestershire sauce
2 tsp garlic powder
Fresh ground black pepper
Salt (as much as your blood pressure can stand)
1 tsp cayenne pepper
Unseasoned breadcrumbs
Here is what you do to put it all together:
Dump your ground beef into a mixing bowl and smash it out flat with your fist. Now add the egg, the diced onion, the Worcestershire sauce, the garlic powder, twist in the black pepper with your pepper mill, add a teaspoon or so of salt, and the cayenne pepper.
Massage everything together with your fingers. If you are squeamish or a city slicker, use a big wooden spoon or a dough cutter. Don’t overwork the mixture, just get it combined evenly.
Now look at what you have put together. Is it too moist? Then toss in some breadcrumbs to thicken things up and make it hold together a little better. The amount will depend on the quality and fat content of your ground beef.
When you are satisfied with your mixture, reach in and divide it up into three equal balls. Are they equal? No? Then adjust them by pinching off a little meat from the ones that are too big and add it to the ones that are too small.
Divide the three balls in half each. You should have six blobs of ground beef mixture. Flatten the blobs out into 3/8” thick patties about 4” to 5” in diameter.
Now crumble up your blue cheese and place 1/3 of the cheese into the middle of three of the patties. Add a second patty on top of the blue cheese and carefully squeeze the two patties together around the cheese, pinching the edges together to close up the “seam.”
You should now have three nice, fat, blue cheese stuffed burgers.
Fire up the grill, toss them on, cook them done like you like them, and EAT.
Enjoy Y’all,
The Redneck Gourmet
Sunday, May 29, 2005
Baby Back Pork Ribs
Sometimes I surprise myself.
Today’s Memorial Day BBQ effort was one of those events that you can't plan in advance—it just happens. We cooked ribs on the grill by the neighborhood pool.
In addition to charcoal and hickory chips, we also used up a bunch of ice, rum, and tequila in the blender poolside and entertained some innocent bystanders as our neighbors wandered into the proceedings. Can you say “drive-by BBQ?”
I barely got to eat any of the ribs myself. Oh well...
By cooking ribs, I don’t mean that I stripped the plastic wrap off the ribs and tossed them on the grill—no sir, I gave my baby back pork ribs a day at the health spa. If I were a rib, I would have been quite happy doing what my ribs did today.
Here’s what I did with (to) my ribs…
First there was a nice BRINE BATH:
1-1/2 gallon of water (enough for three or four racks of ribs)
½ cup of kosher salt
½ cup of sugar
2/3 cup white vinegar
2/3 cup apple cider vinegar
(Increase the proportions of the ingredients if you need more water)
Put the brine together in a large covered boiler (mine was a three gallon pot.) Open your rib packaging and rinse the ribs off under cold water in the sink. Place the ribs on a cutting board and carefully strip off the “skin” membrane on the back side (the concave side.) Also cut away any extra chunks of fat and membrane that you don’t want to eat. By now your ribs should look very pretty.
Place your ribs in the brine, put the pot in the refrigerator, and let them swim around overnight, or for at least six hours (mine went about eight hours.)
When you are ready to cook your ribs, pull them out of the brine and place them in a pan or on a cookie sheet to drain for a few minutes. Pat them dry with a clean dish rag.
Next my ribs had a nice RUBDOWN:
1/8 cup black pepper
1/8 cup paprika
1-1/2 tbsp sugar
1 tbsp salt
1 tsp dry mustard
1 tsp cayenne pepper
Mix up the rub in a mixing bowl, then store it in a small jar or plastic container until you are ready to use it. Sprinkle the rub over the ribs and rub it in with your fingers.
Then my Ribs went into a HOT SAUNA:
Now Your ribs need to go on the grill to cook. Don't use a gas grill (OK, if you must, you must), but don't just pile a bunch of charcoal brickettes up and light them using "Gulflight" lighter fluid...that stuff stinks. I use an electric grill starter and for these ribs you want to use indirect heat. After the coals are hot, push the charcoal over to the sides of the grill and cook the ribs over a pan of water in the center. I stood my rib racks up on their sides vertically, leaning against each other for support.
Now here is the important part--regulate your grill temperature to somewhere between 200 deg F and 250 deg F. Use those vents and dampers on the grill, don't just stand there and complain, burning off your eyebrows and the hair on your knuckles. (Sorry, I guess that ladies don't have hair on their knuckles?)
If you will keep the temperature under control, you can expect to spend between 2-1/2 and 3 hours fooling around at the pool or otherwise waiting while the ribs get nice and tender. Pour yourself a drink and relax...this is supposed to be vacation, not work, you know?
For my ribs "suntan lotion," I made some Kansas City Style BBQ Sauce:
½ cup light (or dark) brown sugar
1 tbsp dry mustard powder
1 tbsp dried ginger
½ tbsp chili powder
½ tsp cayenne pepper
½ tsp black pepper
¼ tsp allspice
3 cups catsup
¼ cup black strap molasses
¼ cup water
½ cup white vinegar
I took the rib racks off the grill at about the 2-1/2 hour point and brushed them all over with a thick coating of the BBQ sauce, then put them back on the grill for the final half hour of cooking.
By the time my ribs had finished, I had collected a couple of kids and five other adults that had designs on sampling the results of my efforts.
We broke out the slaw, potato salad, and sliced up a fresh pineapple and ATE. (Did I mention the home-made Key Lime Pie for desert?)
Regards Y’all,
The Redneck Gourmet
Subscribe to:
Posts (Atom)
